For licensing we need to identify who is accessing the licence, so the first step would be to either create a new account on your device with your CRSid or renaming your current username to match your CRSid. Please note that your Account Name, Hostname, and IP address will also be logged when accessing the licence server.
Please click the header of the relevant operating system to display instructions.
Warning! – If you have any Autodesk software installed please do not follow the instructions below and instead use the ‘Windows 10 – Create new account’ further down the page.
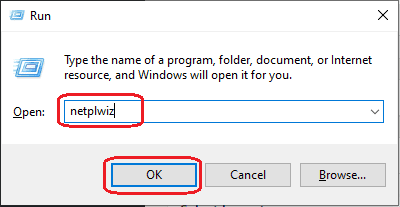
Step 1: Press Windows key + R, type netplwiz into the Run window and click ‘OK’, as below:
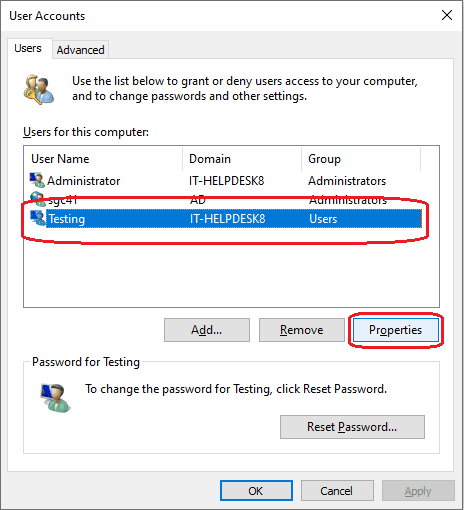
Step 2: A User Accounts window will appear, select the account you wish to change, and then click ‘Properties’, as below:
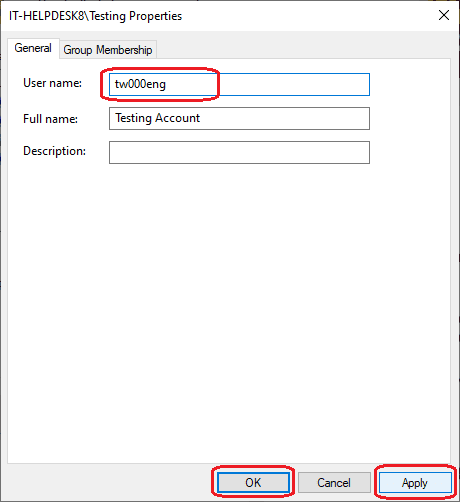
Step 3: Within the General tab, change the ‘User name:’ to your CRSid, click ‘Apply’, and then ‘OK’, as below. In this example, we are using the CRSid ‘tw000eng’.
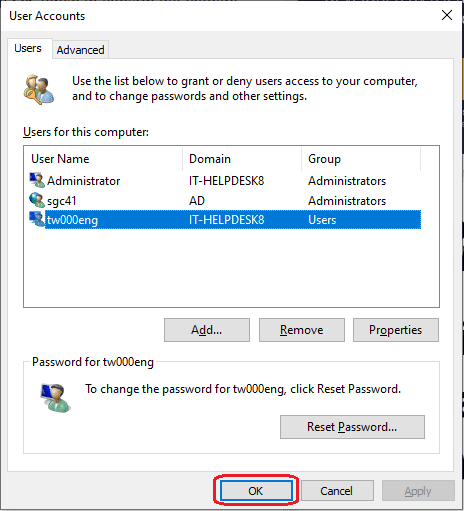
Step 4: Check that the user name has been updated correctly and then click ‘OK’, as below:
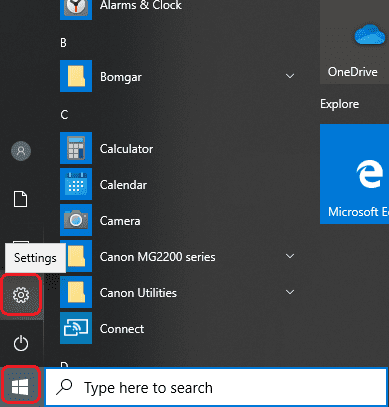
Step 1: Click the Start menu and open the Settings app, as below:
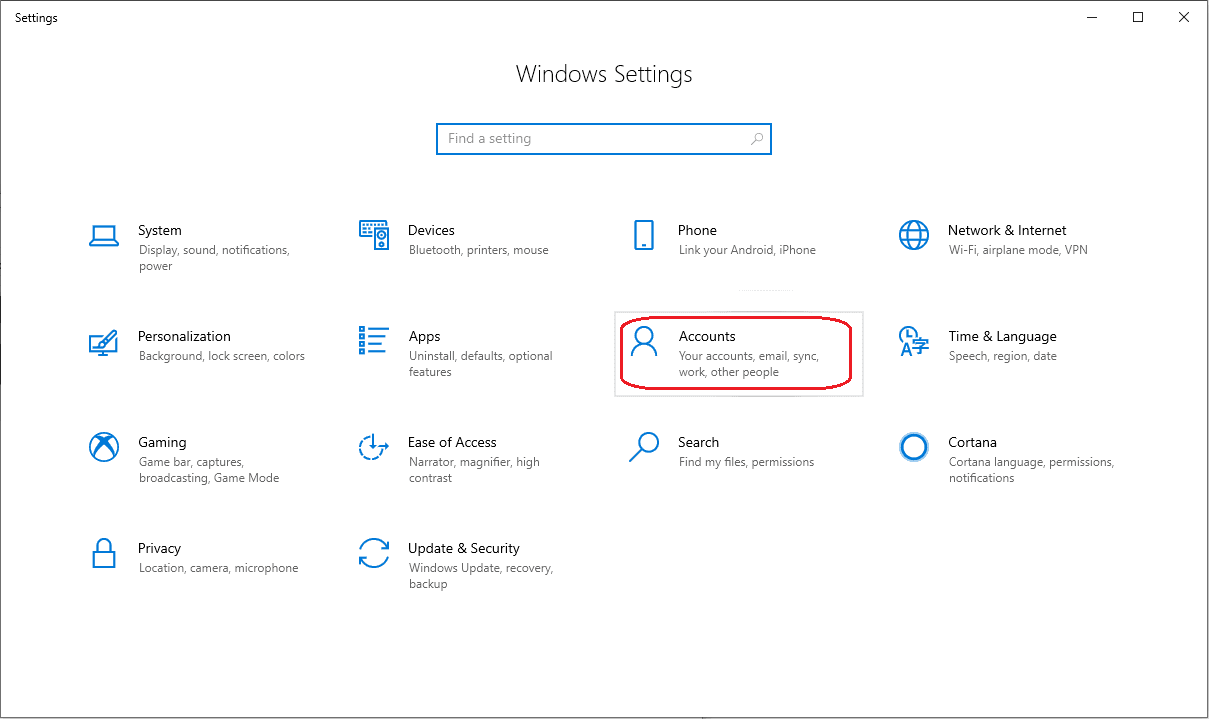
Step 2: Select ‘Accounts’, as below:
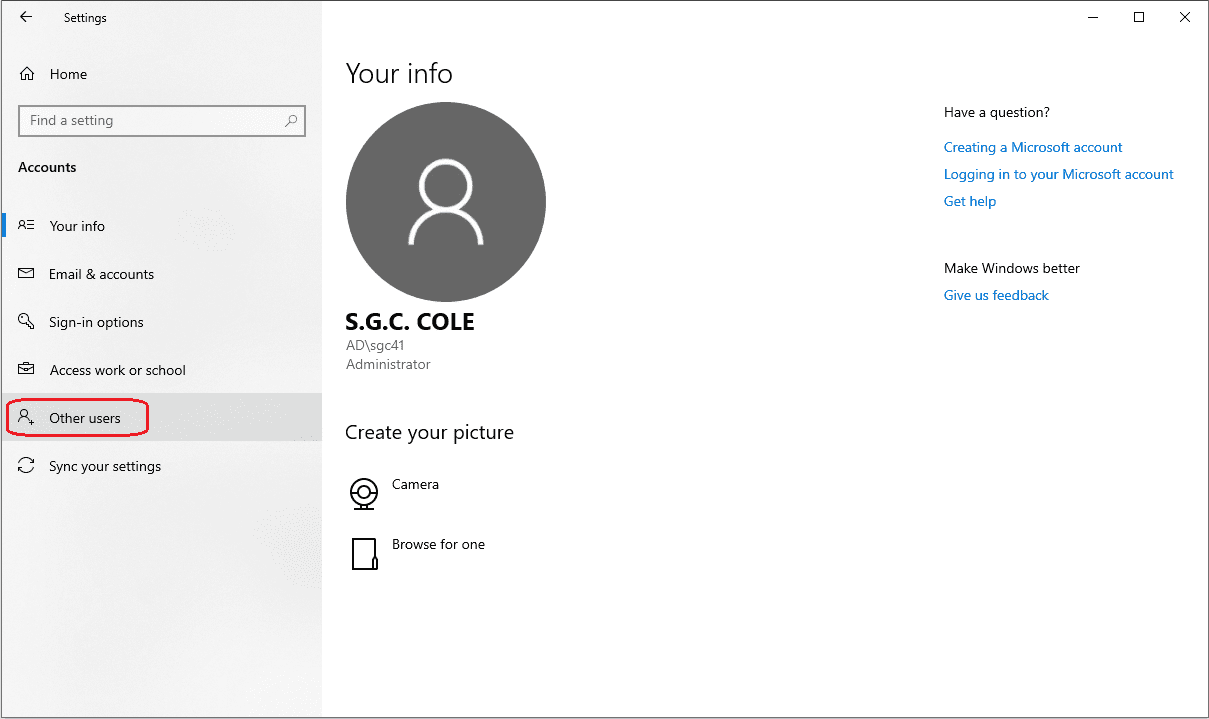
Step 3: Select ‘Other users’, as below:
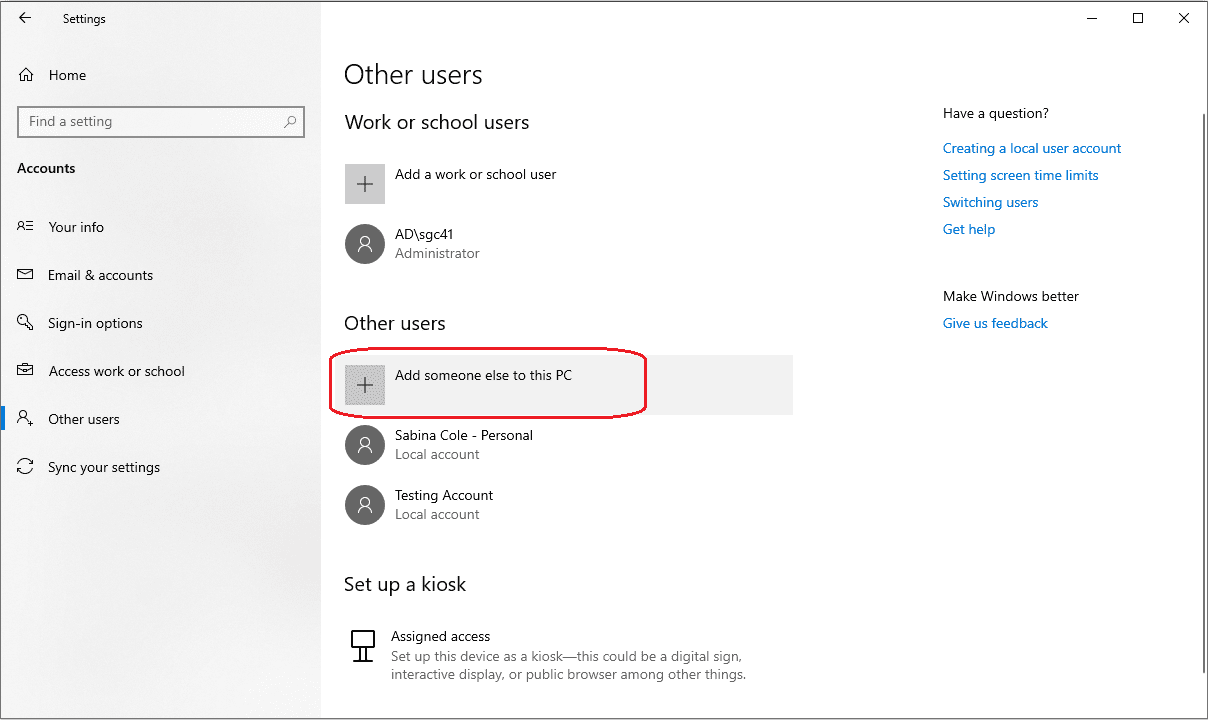
Step 4: Select ‘Add someone else to this PC’, as below:
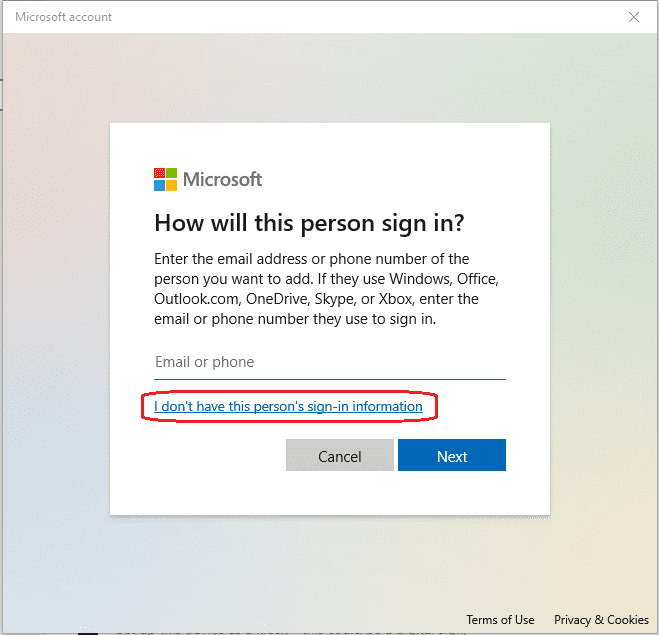
Step 5: In the Microsoft account window, click ‘I don’t have this person’s sign-in information’, as below:
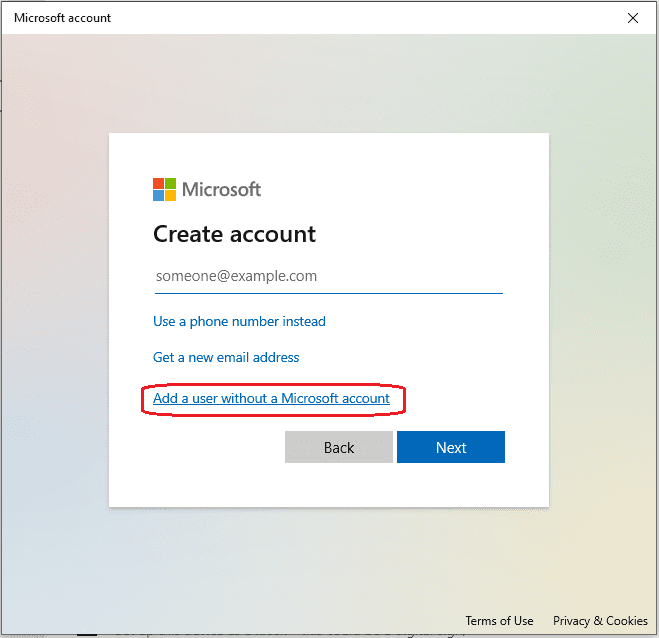
Step 6: Select ‘Add a user without a Microsoft account’, as below:
Step 7: Enter your CRSid under ‘Who’s going to use this PC?’, as below. In this example, we are using the CRSid ‘tw000eng’.
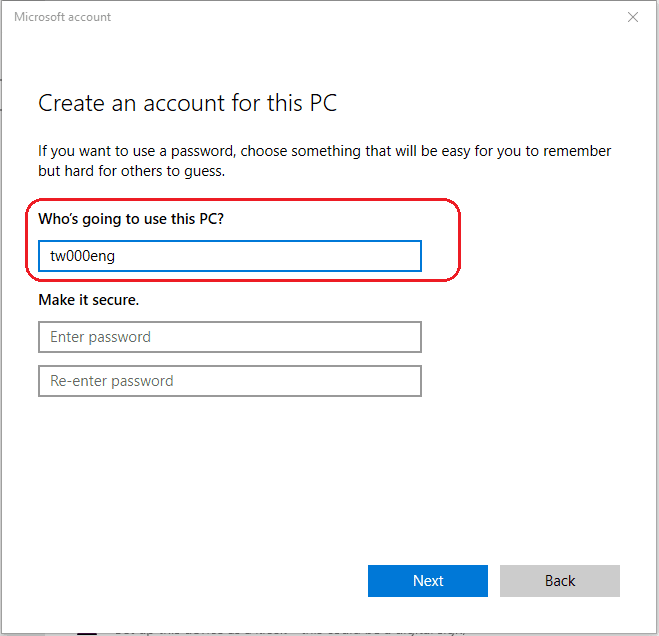
Step 8: Enter a password and then fill out the security questions before clicking ‘Next’.
Step 9: Your new account should now appear under ‘Other users’, as below:
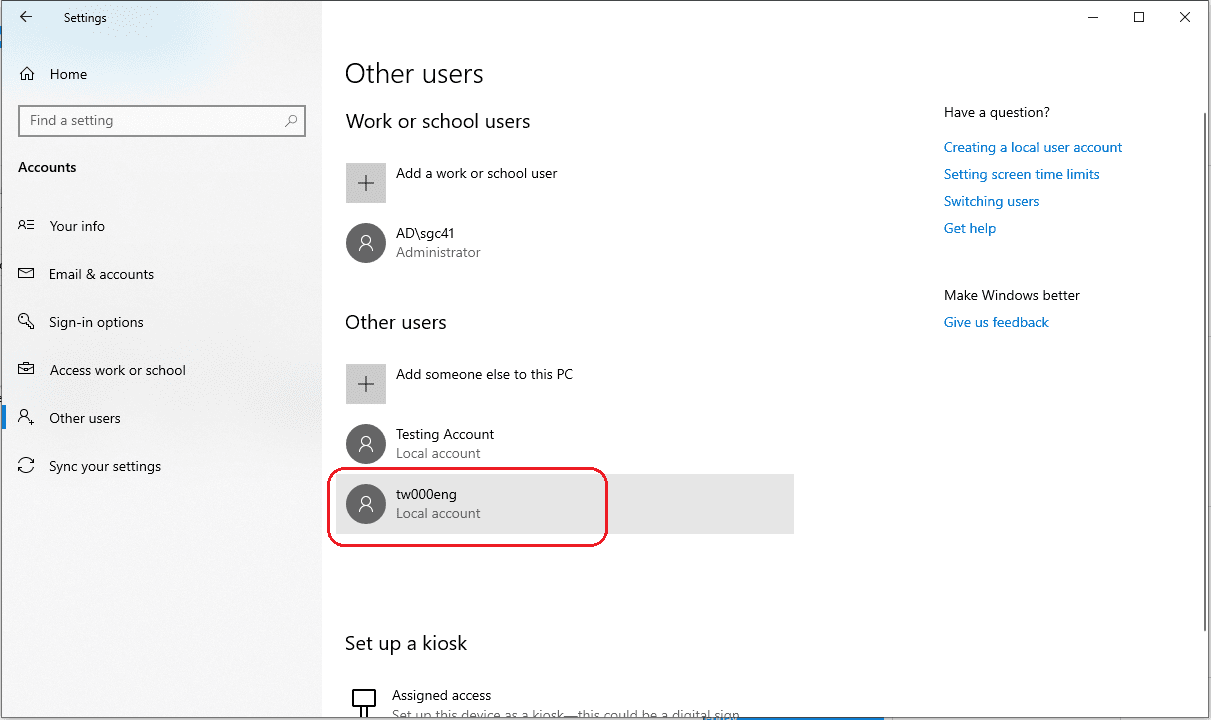
Step 10: Click on the new account and select ‘Change account type’.

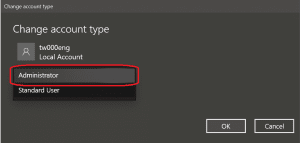
Step 11: In the ‘Change account type’ menu, press ‘Standard User’ to open the account type selection menu. Change the account type to ‘Administrator’ and select ‘OK’ to continue.
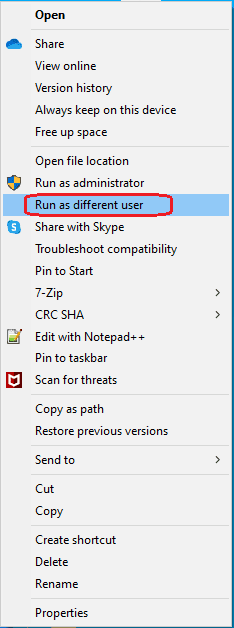
Step 12: You can now use this account to run the software whilst logged into your normal account by holding the SHIFT key and right-clicking on the software application. In the menu select ‘Run as different user’, as below:
Step 13: In the Windows Security window, enter .\CRSid for the username, where CRSid is replaced with your CRSid, and the password you entered above. Then click ‘OK’ as below.
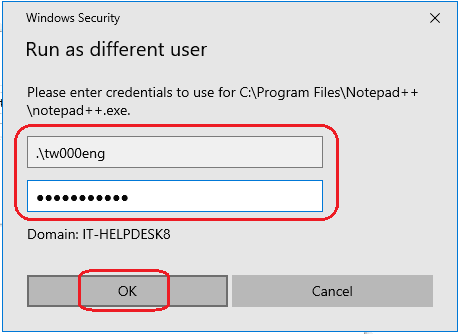
Please note: The username contains a backslash (\) rather than a forward slash (/).
Step 1: Log out of the account you are renaming and log into a different administrator account.
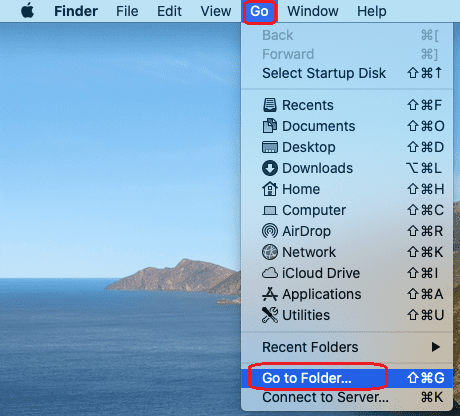
Step 2: Click ‘Go’ and select ‘Go to Folder’ from the menu, as below:
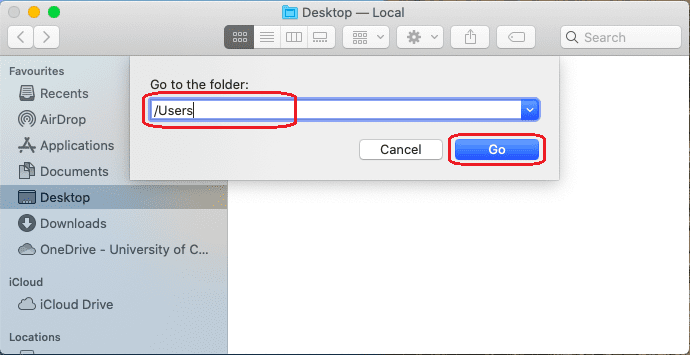
Step 3: Type /Users into the window and then click ‘Go’, as below:
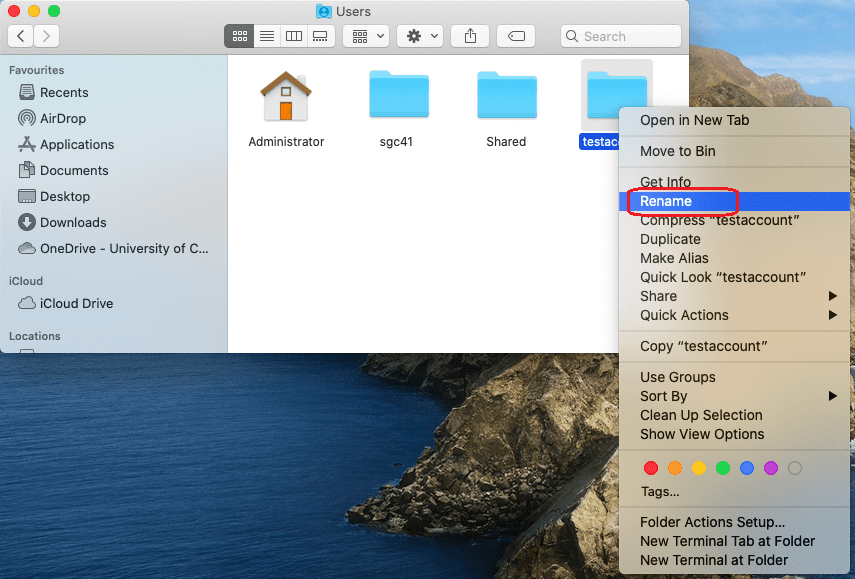
Step 4: Rename the relevant account’s home folder with your CRSid by holding the Ctrl key and clicking on the folder. From the menu select ‘Rename’, as below. Please note that the home folder name cannot contain any spaces.
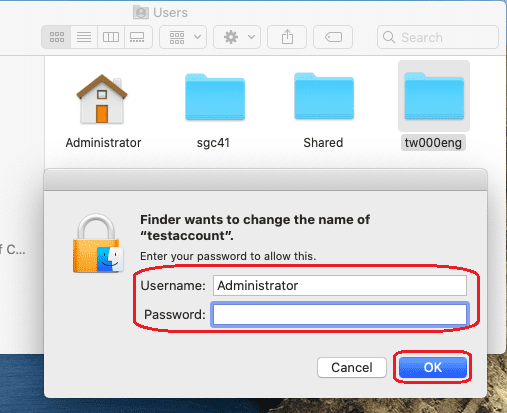
Step 5: Once you have renamed the folder with your CRSid, you will be prompted to enter the credentials of the administrator account you are logged into. Enter the username and password and then click ‘Go’, as below. In this example we are using the CRSid of ‘tw000eng’ to rename the file.
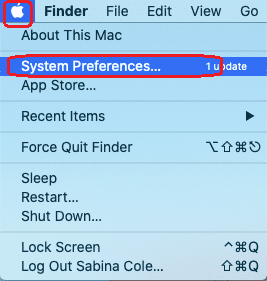
Step 6: Click the Apple menu and then select ‘System Preferences’, as below:
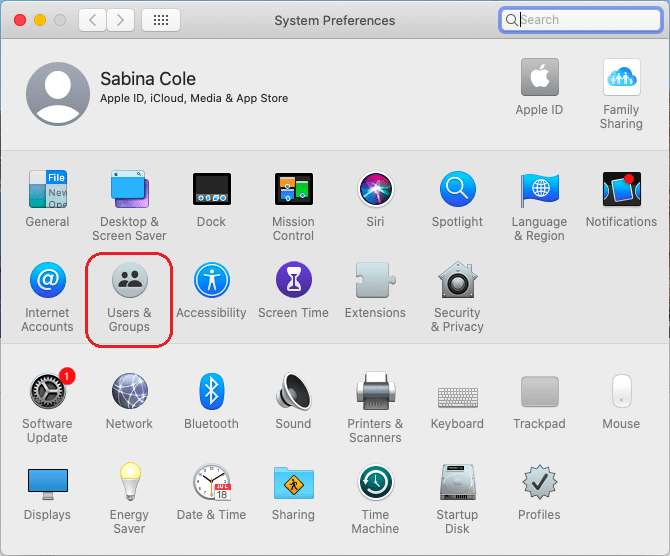
Step 7: In the System Preferences window that appears, select ‘Users & Groups’, as below:
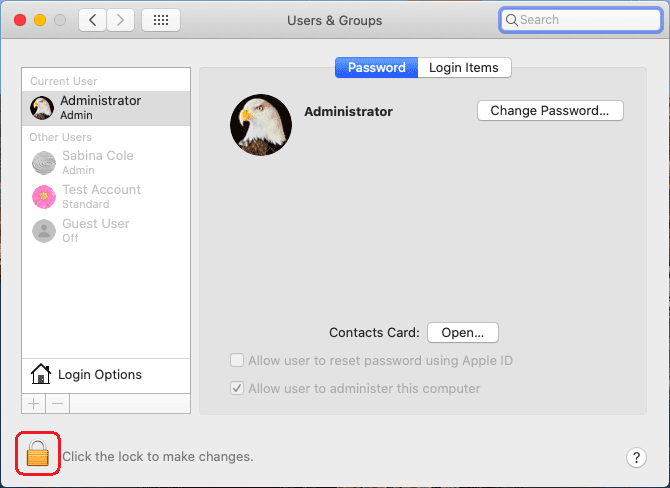
Step 8: Click the padlock at the bottom left of the Users & Groups window, as below:
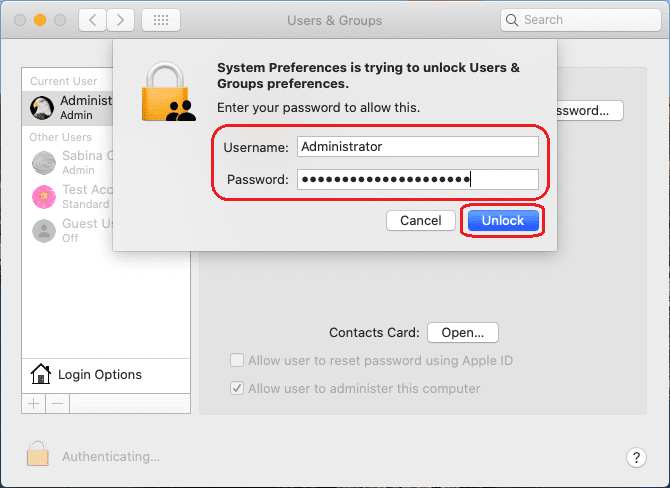
Step 9: Enter the username and password of the administrator account you are currently logged into and click ‘Unlock’, as below:
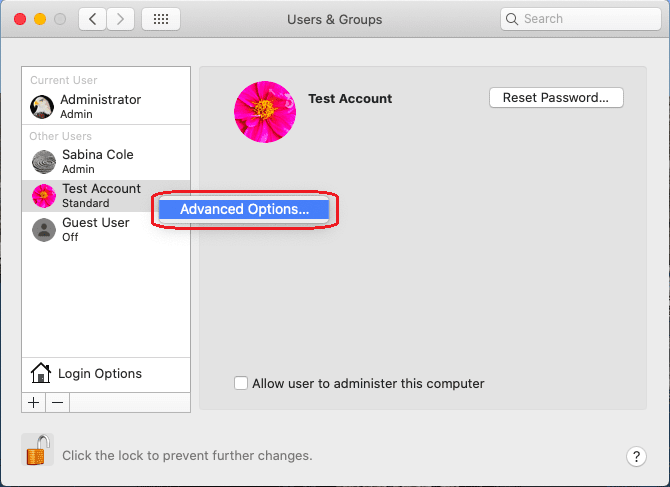
Step 10: Hold the Ctrl key and click on the account you are renaming and then select ‘Advanced Options…’, as below:
Step 11: Change the ‘Account name’ to your CRSid and then click ‘Choose…’, as below:
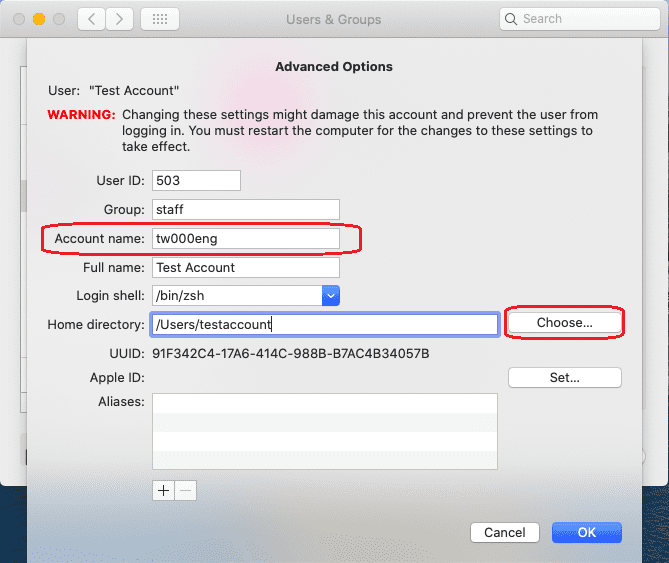
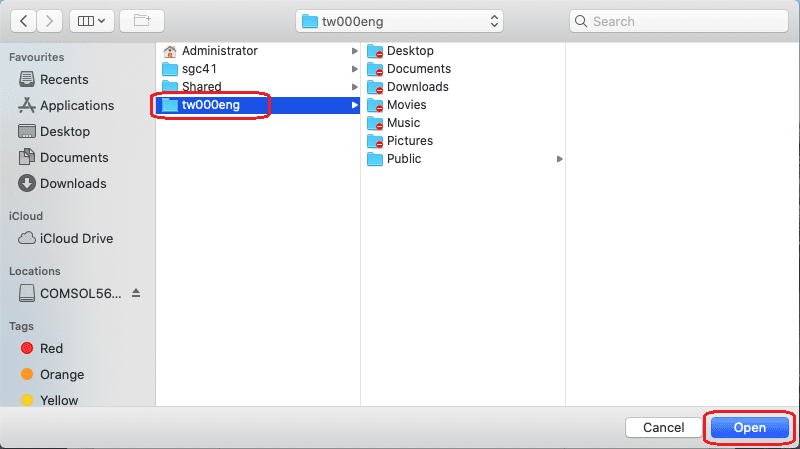
Step 12: Select the home folder that you renamed earlier with your CRSid and click ‘Open’, as below:
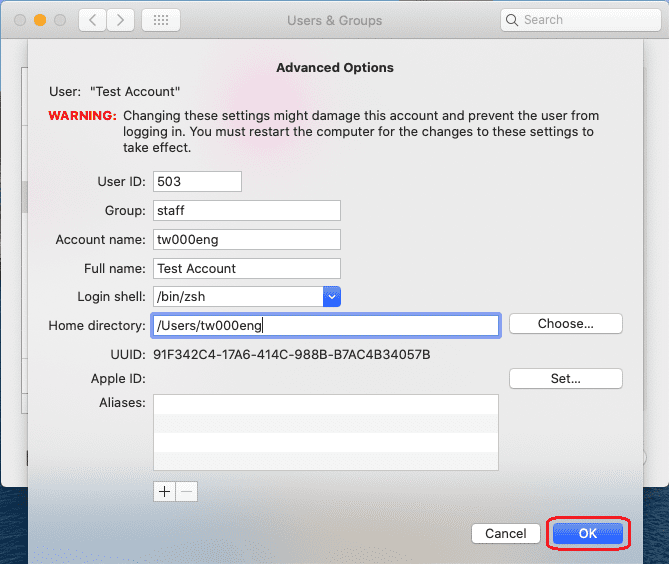
Step 13: Check that you have selected the correct home folder and entered the correct account name before clicking ‘OK’, as below:
Step 14: Restart your computer for the changes to take effect.
Step 15: Log into the renamed account and check that everything is working.

Step 2: In the System Preferences window that appears, select ‘Users & Groups’, as below:

Step 3: Click the padlock at the bottom left of the Users & Groups window, as below:

Step 4: Enter the username and password of the administrator account you are currently logged into and click ‘Unlock’, as below:

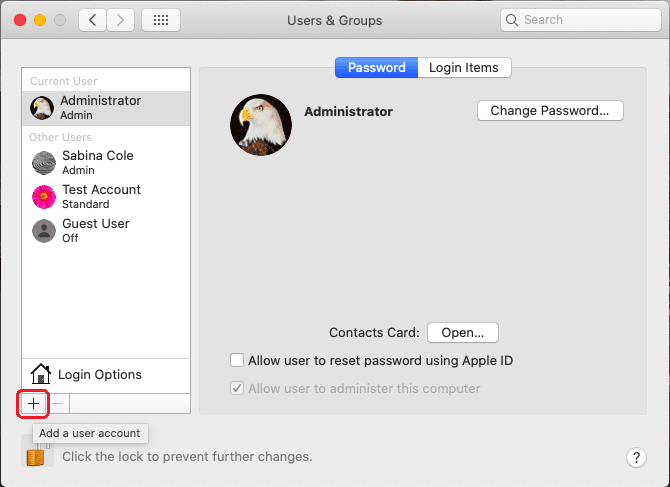
Step 5: Click the ‘+’ to add a new account, as below:
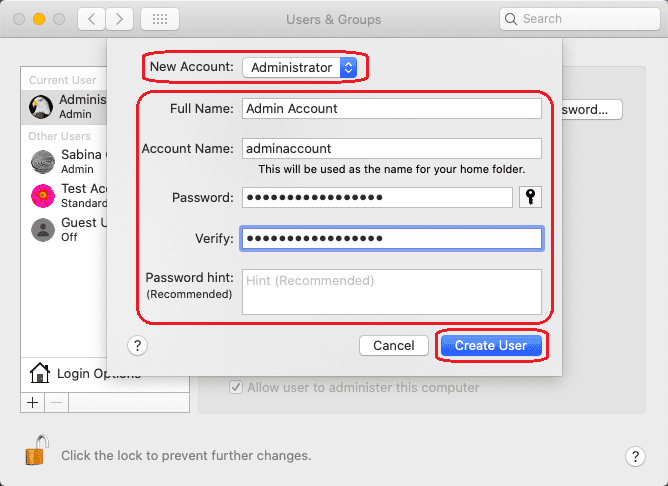
Step 6: For ‘New Account:’ select ‘Administrator’, fill in the rest of the fields and click ‘Create User’, as below. In this example we are using ‘Admin Account’ for the full name and ‘adminaccount’ for the account name.
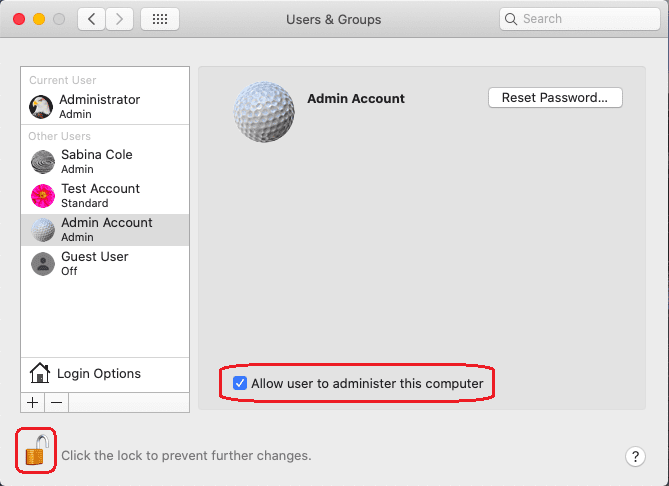
Step 7: Ensure that ‘Allow user to administer this computer’ is checked and then click the padlock to prevent further changes being made, as below:
Step 8: Log out of your account and log into the new administrator account you have just created. You will now be able to follow the ‘MacOS – Change account name’ instructions above.

 Computing help and support